Conflicting Recommendations on Iron for Breastfed Babies: Navigating the AAP Guidelines
When it comes to infant nutrition, the American Academy of Pediatrics (AAP) is often a go-to resource for parents and healthcare providers alike. However, when it comes to iron supplementation for breastfed babies, the guidance isn’t always clear-cut. Conflicting recommendations can leave parents feeling uncertain about what’s best for their little one. Let’s break down the AAP’s iron recommendations, the reasoning behind them, and how to approach this issue as an informed parent.
Why Iron Matters for Babies
Iron is a crucial nutrient for infants, supporting rapid growth, brain development, and overall health. Babies are born with iron stores that typically last them about four to six months. After this period, they rely more on external sources to meet their iron needs. For formula-fed babies, most infant formulas are fortified with iron, which helps prevent deficiency. However, breastfed babies don’t receive the same amount of iron through breastmilk alone.
AAP’s Recommendations on Iron Supplementation for Breastfed Infants
The AAP’s guidelines on iron supplementation for breastfed infants have varied over time, creating some confusion. Currently, the AAP suggests that exclusively breastfed babies may need iron supplementation starting around 4 to 6 months of age. Let’s look at some of the specific recommendations and the concerns they raise.
1. AAP’s 2010 Recommendation
In 2010, the AAP recommended that exclusively breastfed infants begin taking iron supplements at 4 months of age. The rationale was that breastmilk is naturally low in iron, and by this age, the infant’s natural iron stores from birth may start to deplete. They suggested a daily supplement of 1 mg/kg of iron until the baby begins consuming iron-rich complementary foods.
2. Confusion in Practice
This recommendation has led to some confusion among parents and healthcare providers alike. Breastfeeding advocates argue that breastmilk, while low in iron, is often sufficient to meet a baby’s needs until about six months, at which point iron-rich solid foods can be introduced. Additionally, the potential for iron overload and side effects from early supplementation has raised concerns.
3. AAP’s Position on Starting Solids and Iron-Rich Foods
While the AAP recommends starting iron-rich complementary foods around 6 months, they also emphasize that breastfed infants may need iron supplementation before this. This suggestion has caused conflicting interpretations, as some parents prefer to wait until solid foods are introduced to assess their baby’s iron needs naturally.
The Debate: Supplementation vs. Solid Foods
The debate largely revolves around when and how to meet a baby’s iron needs naturally through food versus supplements. Many pediatricians support introducing iron-rich solid foods, like pureed meats, iron-fortified cereals, and leafy greens around 6 months. For some babies, this gradual introduction of foods may provide enough iron without the need for additional supplements.
On the other hand, some infants—especially those at higher risk for iron deficiency, such as premature or low-birthweight babies—may benefit from early supplementation to avoid deficiency and support their rapid growth and development. In these cases, iron supplements can be a beneficial safety net.
Weighing the Pros and Cons of Early Iron Supplementation
Pros of Iron Supplementation:
• Prevents iron deficiency and related developmental delays in babies at risk.
• Provides a consistent source of iron for infants who may not yet be ready to start solid foods.
Cons of Iron Supplementation:
• May disrupt the natural balance in breastfed infants, as breastmilk is generally low in iron but highly bioavailable (easily absorbed).
• Can cause digestive issues, such as constipation or upset stomach.
• Potential risk of iron overload if supplementation is not carefully monitored.
Tips for Parents Navigating Conflicting Recommendations
1. Consult Your Pediatrician
Every baby’s needs are unique. Consulting with your pediatrician about your child’s growth, risk factors, and overall health can help you make an informed decision. Some pediatricians may recommend testing your baby’s iron levels at 4 to 6 months to assess their needs.
2. Watch for Signs of Iron Deficiency
Common symptoms of iron deficiency in infants include pale skin, fatigue, slow weight gain, and decreased appetite. If you notice any of these signs, it’s a good idea to talk to your healthcare provider about possible iron supplementation.
3. Focus on Iron-Rich First Foods
If you choose to wait until 6 months to introduce iron, focus on iron-rich foods like pureed meats, legumes, leafy greens, and fortified cereals. Combining these with foods high in vitamin C can improve iron absorption.
4. Consider a Balanced Approach
Some parents find a middle ground by introducing small amounts of iron-rich solids at around 5 months if their baby shows readiness while gradually working toward full meals at 6 months.
Conclusion
Navigating the AAP’s iron recommendations for breastfed babies can be challenging, especially with differing perspectives from healthcare providers and breastfeeding advocates. Ultimately, there’s no one-size-fits-all answer, and the best approach is individualized. By discussing your baby’s needs with a trusted pediatrician and staying aware of signs of iron deficiency, you can feel more confident in your decision. After all, your goal is to support your baby’s health, growth, and development, no matter what path you choose.
The Difference Between Non-Dairy and Dairy-Free: What You Need to Know
When it comes to choosing milk alternatives or finding foods without dairy, labels like “non-dairy” and “dairy-free” can seem interchangeable. However, these terms mean different things and can impact dietary choices, especially for people with lactose intolerance, milk allergies, or those following a vegan lifestyle. In this post, we’ll break down the differences between non-dairy and dairy-free to help you make informed choices.
1. What Does “Dairy-Free” Mean?
“Dairy-free” refers to products that do not contain any dairy ingredients, including milk, lactose, casein, or whey. These products are entirely free from any substance derived from animal milk. For those who need to avoid dairy due to allergies, intolerance, or dietary preferences, dairy-free is a safe choice.
• Ideal For: People with a milk allergy, lactose intolerance, or anyone avoiding all dairy products for health or lifestyle reasons.
• Common Dairy-Free Products: Plant-based milks (like almond, oat, soy, and coconut milk), vegan cheeses, dairy-free ice creams, and yogurt made from non-dairy sources.
2. What Does “Non-Dairy” Mean?
“Non-dairy” is a bit more complex. While “non-dairy” suggests that a product does not contain milk or milk-based ingredients, the FDA allows products labeled “non-dairy” to include small amounts of dairy derivatives, such as casein, a milk protein. Casein and other derivatives are sometimes added to improve texture or flavor, especially in products like coffee creamers and whipped toppings.
• Ideal For: People with lactose intolerance who can tolerate milk derivatives like casein, or those looking to reduce but not fully eliminate dairy.
• Common Non-Dairy Products: Coffee creamers, some whipped toppings, and certain cheese substitutes. Always check the ingredients if you need to avoid all dairy, as non-dairy doesn’t always mean 100% dairy-free.
Why Understanding the Difference Matters
For people with lactose intolerance, both non-dairy and dairy-free products might be options, depending on their tolerance to lactose. However, for people with a milk allergy, choosing dairy-free is crucial to avoid exposure to any milk proteins. Similarly, for those following a vegan diet, dairy-free guarantees there are no animal products in the food or drink.
Reading Labels Carefully
While understanding these terms is helpful, label reading is essential. Ingredients can vary widely between brands, and some non-dairy products still contain milk derivatives like casein or whey. When in doubt, a quick ingredient scan will let you know if a product meets your needs.
Conclusion
When products are labeled “dairy free” or “non-dairy” prominently on the front of the package, it may just be for marketing. To understand the truth, be sure to check the ingredient list which is usually in fine print on the back. Navigating non-dairy and dairy-free options can be tricky, but knowing what these terms mean helps you make choices that fit your health needs and dietary preferences. Whether you’re avoiding dairy entirely or looking to cut back, being an informed consumer makes it easier to shop with confidence.

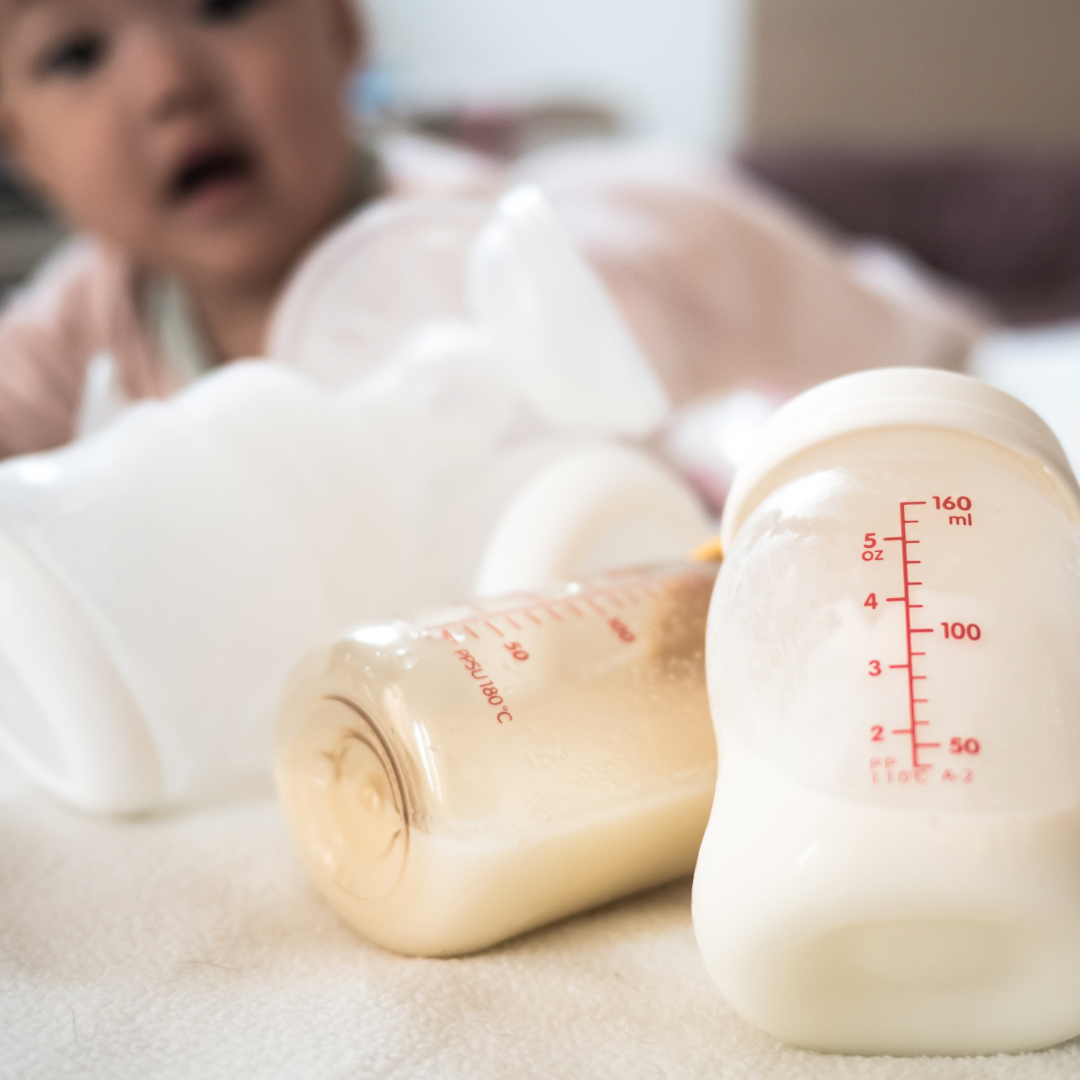
The facts about foremilk and hindmilk
Foremilk and hindmilk are terms used to describe the two different types of breastmilk produced during a single breastfeeding session, and they have been studied to understand their roles in infant nutrition.
1. Foremilk is the milk released at the beginning of a feeding session. It tends to be higher in water content and lower in fat, serving to hydrate the baby and quench thirst. It is usually lighter in color due to its lower fat content.
2. Hindmilk is the milk that comes later in the feeding session, once the baby has removed some of the initial foremilk. Hindmilk is richer in fat and calories, which help the baby feel full and gain weight. This milk is creamier and higher in calories, supporting longer-term satiety.
Key Research Findings:
• Fat Content Variation: Research shows that as a feeding session progresses, the fat content in breastmilk gradually increases. This is due to the way fat globules in milk are released from breast tissue as the breast is gradually emptied.
• Myth of “Exact Timing”: Older advice sometimes suggested mothers switch breasts on a timed schedule to make sure their baby gets hindmilk. However, newer research suggests that timing varies between individuals, and babies tend to self-regulate well, getting both foremilk and hindmilk in quantities that meet their needs.
• Foremilk-Hindmilk Imbalance: Rarely, some babies may experience an imbalance if they only drink foremilk. This is especially true if the mother has an oversupply. This can cause symptoms like gassiness or green stools due to higher lactose levels in foremilk, which may overwhelm a baby’s ability to digest it. In these cases, strongly consider working with a lactation specialist.
• Individual Variations in Milk Composition: Studies show that milk composition varies not only across a feeding but also based on the mother’s diet, time of day, and infant’s needs. This individualized variation means that for most breastfeeding mothers, focusing on feeding cues rather than strictly monitoring “foremilk” and “hindmilk” will naturally balance a baby’s intake.
Most lactation experts today recommend feeding “on demand” and allowing the baby to switch sides if there is a natural break in the nursing session, baby needs a burp ot baby needs a reset. You can always switch back to the first side too! This approach helps ensure the baby receives a balance of both foremilk and hindmilk without overcomplicating feeding strategies.
When in doubt, get individualized support with your own lactation specialist. I am available in the Boston area or virtually.
Peppermint Season is Here!
The Effects of Peppermint on Breast Milk Supply: What Nursing Moms Need to Know
When you’re breastfeeding, it’s natural to be mindful about what you consume. After all, everything from your diet to your lifestyle choices can potentially impact your milk supply and your baby. One question that often arises for nursing moms is whether peppermint, a common ingredient in teas, candies, and natural remedies, can reduce breast milk production. Here’s what you need to know about peppermint and its effect on milk supply.
The Link Between Peppermint and Reduced Milk Supply
Peppermint, particularly in its concentrated forms (like peppermint oil or extract), has been associated with a decrease in breast milk production for some women. Peppermint is a natural herb that has mild anti-lactogenic properties, meaning it can potentially reduce milk supply. While not every nursing mother will experience a decrease in milk production from consuming peppermint, it’s worth understanding how and why this may happen.
Why Peppermint May Affect Breast Milk
Certain compounds found in peppermint have been reported to interfere with lactation. The primary compound responsible for these effects is menthol, which, in high doses, may reduce milk production. The exact mechanisms are still being studied, but it’s thought that menthol may work by influencing hormones that regulate milk supply or by affecting the milk-producing tissues directly. Additionally, peppermint oil can sometimes have a cooling effect on the skin, which may signal the body to produce less milk.
Forms of Peppermint That Might Impact Milk Supply
If you’re concerned about peppermint and your milk supply, it’s helpful to know which forms of peppermint might have a more noticeable effect:
1. Peppermint Oil: Essential oils are highly concentrated, which means that peppermint oil packs a stronger punch than, say, a peppermint-flavored tea. Applying peppermint oil directly to the skin around the breasts, using it aromatically, or ingesting it can lead to a potential reduction in supply.
2. Peppermint Tea: While less concentrated than essential oils, drinking large amounts of peppermint tea might still have an impact on your milk supply, especially if you’re consuming it regularly.
3. Peppermint Candy and Foods: The amount of peppermint in foods like candies or flavored drinks is usually minimal and unlikely to affect milk supply significantly. However, if you consume these items frequently and are sensitive to peppermint’s effects, you may still notice some changes.
4. Medications or Lozenges Containing Peppermint: Some cold remedies or digestive aids contain peppermint oil, so be cautious if you’re using these types of products often.
Is There a Safe Level of Peppermint for Nursing Moms?
If you enjoy peppermint-flavored foods or the occasional peppermint tea, don’t worry! Small amounts of peppermint are generally safe and are unlikely to drastically reduce your milk supply. Many nursing moms consume peppermint without any negative effects on lactation. However, if you’re concerned, especially if you notice a dip in supply, you can try reducing peppermint intake and see if your milk production improves.
If you’re considering peppermint oil or a concentrated peppermint product (for example, in aromatherapy), it may be wise to consult with a lactation professional to ensure that it won’t interfere with breastfeeding.
What to Do If You Notice a Drop in Milk Supply
If you suspect that peppermint might be affecting your milk supply, here are a few steps you can take:
1. Reduce or Eliminate Peppermint Intake: Cut back on peppermint tea, candy, or products containing peppermint oil and monitor whether your milk supply improves.
2. Try Lactation-Boosting Foods: Herbs like fenugreek, blessed thistle, and foods like oats are believed to help increase milk production. Consider incorporating these into your diet.
3. Work with a Lactation Consultant: If you’re unsure about what might be causing a decrease in milk supply, a lactation consultant can help you identify the cause and develop strategies to boost supply.
4. Stay Hydrated and Nourished: Proper hydration and nutrition are essential for maintaining a steady milk supply. Make sure you’re drinking plenty of water and eating balanced meals throughout the day.
Alternatives to Peppermint
If you love minty flavors but want to avoid peppermint while breastfeeding, consider alternative herbs like spearmint. Although spearmint can have similar effects, it’s generally considered milder. However, as with any herb, it’s wise to consume it in moderation and pay attention to any changes in your milk supply.
Final Thoughts
While peppermint’s effect on breast milk supply is not universally experienced, it’s always wise to be informed about potential risks and monitor your own body’s response. Every breastfeeding journey is unique, and your body may respond differently to herbs and foods than someone else’s. The key is to pay attention to your body’s signals and make choices that support both your well-being and your baby’s.
If you’re ever in doubt, consulting with a lactation consultant or healthcare professional can give you personalized guidance on what’s best for you and your breastfeeding goals. Remember, you’re not alone on this journey—resources are available to help you make the best decisions for you and your baby.

How Infant Craniosacral Therapy Can Set Kids Up for Lifelong Wellness
In the early stages of life, babies undergo immense growth and development—physically, mentally, and emotionally. To support these formative changes, many parents turn to holistic therapies that can help their little ones thrive. One such therapy, infant craniosacral therapy (CST), is gaining attention as a gentle yet powerful approach to enhance wellness. By addressing the body’s alignment and balance early on, CST not only provides immediate benefits for infants but can also lay the foundation for positive long-term health outcomes.

What Is Craniosacral Therapy?
Craniosacral therapy is a hands-on technique that focuses on the central nervous system, specifically the craniosacral system, which includes the membranes and fluid surrounding the brain and spinal cord. This gentle approach involves light, soothing touches that release tension within the craniosacral system, encouraging the body’s natural healing process.
For infants, CST can be especially helpful in resolving common issues like colic, latch difficulties, and sleep disturbances. However, the benefits don’t stop in infancy. Many practitioners and parents believe that craniosacral therapy can have far-reaching effects, supporting overall development and wellness as children grow.
Long-Term Benefits of Infant Craniosacral Therapy
1. Enhanced Nervous System Health
By supporting a balanced craniosacral system in infancy, CST can contribute to a calm and resilient nervous system as a child grows. This balanced system is fundamental for healthy stress management, sleep patterns, and emotional regulation—key elements for a thriving childhood and beyond.
2. Improved Physical Alignment and Mobility
Early craniosacral therapy can help correct subtle misalignments that may have occurred during birth. Addressing these at a young age can lead to better posture, balance, and coordination as the child develops. Proper physical alignment also supports fine and gross motor skills, making it easier for kids to engage in activities and sports confidently.
3. Supporting Cognitive and Emotional Development
As craniosacral therapy helps release tension from the central nervous system, it can create space for clearer neurological signaling and brain development. For growing children, this could translate to improved focus, learning abilities, and emotional resilience—skills that are invaluable as they transition from infancy to toddlerhood and beyond.
4. A Holistic Approach to Wellness
Craniosacral therapy introduces infants to the concept of whole-body wellness from an early age. Parents who choose CST often prioritize holistic health, fostering a family environment where self-care and body awareness are encouraged. This wellness-focused mindset can positively influence children’s lifestyle choices, equipping them with habits that support lifelong health.
5. Strengthening the Bond Between Parent and Child
Beyond the physiological benefits, infant craniosacral therapy sessions are gentle and relaxing, providing an opportunity for parents and babies to connect on a deeper level. The positive, nurturing environment encourages bonding, helping babies feel secure and supported. This strong emotional foundation can contribute to a child’s confidence and self-esteem as they grow.
When to Consider Craniosacral Therapy for Your Infant
Many parents begin CST in the early weeks or months of life, especially if their baby shows signs of tension, discomfort, or developmental challenges. However, craniosacral therapy can be beneficial at any stage of infancy, from birth up to toddlerhood.
Setting Kids Up for Lifelong Wellness
Infant craniosacral therapy offers a gentle start to holistic health care, with benefits that can resonate well beyond infancy. By prioritizing alignment, nervous system health, and emotional well-being, CST can help nurture a foundation for balanced development. For parents seeking a natural, nurturing approach to early wellness, craniosacral therapy is a meaningful investment in their child’s long-term health and happiness.
The Honeybear Bottle: A Fun Tool for Teaching Babies to Drink from a Straw
Teaching babies to drink from a straw is a big milestone that can promote oral motor development and make transitioning to cups easier. One of the most beloved tools in this process is the Honeybear Bottle, a simple yet effective straw-training device designed specifically to help babies learn how to sip from a straw.

What is the Honeybear Bottle?
The Honeybear Bottle is an adorable, bear-shaped bottle that comes equipped with a thin straw. What makes it unique is its soft, squeezable body. Parents can gently squeeze the bottle, helping their baby understand how to draw liquid up the straw. This gentle assistance gives little ones the chance to associate the action of sipping with a reward—liquid flowing through the straw—without overwhelming them.
Why Use a Straw?
Straw drinking offers several benefits for babies:
• Oral Motor Development: Drinking from a straw strengthens the muscles in the lips, tongue, and cheeks, which are important for speech development and feeding skills.
• Reduces Spills: Unlike open cups, straws help limit spills, which is ideal for babies learning to drink independently.
• Smooth Transition: Babies who learn to drink from a straw often find it easier to transition from bottles to cups, reducing dependency on sippy cups.
How to Introduce the Honeybear Bottle
1. Start with Familiar Liquids: Begin with your baby’s favorite drink—whether it’s milk, water, or juice. The familiar taste can encourage them to engage with the straw.
2. Squeeze and Sip: Gently squeeze the bottle so that a small amount of liquid enters the straw and into the baby’s mouth. This helps your baby understand that sipping leads to getting the drink.
3. Offer Encouragement: It might take a few tries for your baby to understand the process, so be patient. Babies learn at their own pace, and consistent practice will help.
4. Practice in Small Sessions: Short, positive practice sessions throughout the day are the most effective. Once your baby gets the hang of it, they’ll be excited to try drinking from a straw on their own.
Why the Honeybear Bottle Works
The Honeybear Bottle’s squeezable design gives parents the ability to provide just the right amount of help without taking over the process completely. Babies feel a sense of accomplishment as they figure out how to sip from the straw with minimal assistance, encouraging independence. Its fun, playful design also adds an element of enjoyment for babies, making the learning process feel like a game.
When to Use the Honeybear Bottle
You can introduce straw drinking to babies as young as six months, depending on their readiness. Some signs that your baby may be ready to learn to use a straw include sitting upright, showing interest in drinking from cups, and using their lips to manipulate objects.
Final Thoughts
The Honeybear Bottle is a fantastic tool for helping babies master straw drinking in a fun and engaging way. With its easy-to-use design and proven developmental benefits, it’s no wonder this little bear has become a go-to for parents teaching their babies an important new skill.
So, if you’re ready to ditch the sippy cups and want a simple, effective way to teach your baby how to drink from a straw, the Honeybear Bottle is a great choice!

Dealing with a raging diaper rash…
I am so excited to tell you all that I cracked the code on my daughter’s diaper rash!!!
She just turned 13 months and while her bum is different from a newborn, some of these principles may apply so I thought I’d share them all.
For context, we’ve been battling eczema and other skin rashes/issues for months now and then this diaper rash popped up a few weeks ago. We are also on a food allergy journey which comes into play here in ways I’m not completely sure but I do think it’s part of the root cause.
I’m embarrassed about this next part, but at her 1 year old check up at the pediatrician I asked about it. The pediatrician thought it looked like strep, and swabbed it and sure enough it was positive for strep. I didn’t know that perianal strep was a thing, and I don’t know why but this feels so embarrassing. It’s like, what is a more basic job of a parent then cleaning their bum! Of course I am giving myself grace as you should too if you should ever find yourself in this situation. It did not come from just not cleaning her well enough. I think that unfortunately there was some underlying irritation and skin breakdown that allowed bacteria and yeast to proliferate.
So we came out of there with prescriptions for oral antibiotics and nystatin ointment.
Over the next few days it seemed to get worse or at a minimum stay the same. The nystatin ointment didn’t seem to do anything, if anything made it worse.
I tried a bunch of other more natural options and the needle was just not moving. (Allimax, medi honey, manuka honey, colloidal silver, Maty’s diaper cream…you name it, I tried it.) I was feeling extremely defeated.
Finally I stumbled upon a Reddit thread talking about the crusting technique. This involves using ostomy powder first and then a barrier cream. The problem is that if you have too much moisture a barrier cream won’t stick and then won’t provide a barrier and you just continue to have a nasty mess.
The ostomy powder absorbs the moisture, so that you can then make a barrier cream stick. Let me tell you, with a one year old, there is a lot more space that needs a barrier so it’s very important to get that layer on there.
I used a homemade cream—just non-nano zinc oxide and jojoba oil. I randomly had the zinc from a few years ago when I tried making my own baby sunscreen.
After a few days of using both the ostomy powder and the zinc cream I was able to go to just using the zinc cream. One other thing, you can’t be shy about getting it in there all the way to the exit if you will.
As of now I’m still using the zinc cream and I’m going to stay vigilant in this maintenance mode. Since we are still battling the food allergies, the skin irritation could come back and flare this up again.
Cross your fingers for us!
How to Wean an under 6 month old Baby: A Gentle Guide

Weaning is a significant milestone in a baby’s life, but when it comes to a young infant, the decision to wean should be made with careful consideration and a deep understanding of the baby’s needs. At this early stage, breastfeeding or formula feeding provides essential nutrients and helps build a strong bond between mother and child. However, there are situations where early weaning might be necessary, such as medical conditions, the mother’s health, or other personal circumstances. If you find yourself in this situation, it’s important to approach the process gently and thoughtfully.Understanding the Needs of an Under 6-Month-Old Baby
At less than six month old, your baby is still in the early stages of development. Breastmilk or formula is their primary source of nutrition, providing not only calories but also vital antibodies, vitamins, and minerals that support their rapid growth. Weaning at this stage is less about introducing solid foods and more about transitioning from breastfeeding or formula feeding to other alternatives like expressed milk, donor milk, or formula.Steps to Wean a One to Six-Month-Old Baby
1. Consult a Healthcare ProfessionalBefore making any decisions, consult with your pediatrician or a lactation consultant. They can provide guidance tailored to your baby’s specific needs and health considerations. They may also offer alternatives or strategies that allow you to continue providing breast milk, even if direct breastfeeding is not possible. 2. Gradual TransitionWeaning should be a gradual process to minimize stress for both you and your baby. If you’re transitioning to formula or expressed milk, start by replacing one breastfeeding session with a bottle feeding. Observe how your baby responds before gradually replacing more feedings. This slow transition helps your baby adjust to the new feeding method while maintaining their nutritional intake. 3. Comfort and BondingWeaning can be emotionally challenging for both mother and baby. To maintain the bond that breastfeeding fosters, ensure that feeding times remain calm and nurturing. Hold your baby close, make eye contact, and speak softly to them during bottle feedings. This helps maintain the sense of security and connection your baby has grown accustomed to during breastfeeding. 4. Monitor Your Baby’s ReactionPay close attention to how your baby reacts to the weaning process. Some babies may adjust quickly, while others might need more time. Look for signs of discomfort, changes in appetite, or digestive issues, and be ready to slow down the weaning process if needed. Your baby’s well-being is the most important factor, so be flexible and responsive to their needs. 5. Self-Care for MothersWeaning can also be physically and emotionally challenging for mothers. As your baby reduces breastfeeding sessions, your body will adjust its milk production, which can sometimes lead to discomfort or engorgement. Practice self-care by staying hydrated, applying warm compresses, and gently expressing milk if needed to relieve pressure. Additionally, give yourself grace and seek support from family, friends, or professionals if you find the emotional aspects of weaning difficult. 6. Alternatives to BreastfeedingIf you need to stop breastfeeding entirely, consider alternatives like donor milk, which can be accessed through milk banks or breastfeeding support groups. This option allows your baby to continue receiving the benefits of human milk, even if you’re unable to provide it directly.
When Not to Wean
In most cases, it is recommended to continue breastfeeding or formula feeding until the baby is at least six months old. Weaning a one-month-old is typically not advised unless there are compelling reasons, such as medical issues or specific recommendations from a healthcare provider. Breast milk or formula at this stage is crucial for your baby’s development, so the decision to wean should be made carefully, considering all factors.Conclusion
Weaning a young baby is a delicate process that requires careful consideration and a gentle approach. If you find yourself needing to wean at this early stage, prioritize your baby’s nutritional needs, maintain a strong emotional bond, and consult with healthcare professionals to ensure the transition is as smooth as possible. Remember, every baby is different, and what matters most is finding a solution that works for both you and your little one, keeping their health and happiness at the forefront of your decision-making.
How Craniosacral Therapy Can Help with Breastfeeding Issues
Craniosacral therapy is an amazing tool for breastfeeding challenges.

Breastfeeding is a natural and nurturing experience, but for many families, it can come with challenges. Issues like difficulty with latch, milk supply problems, or discomfort during nursing can turn what should be a bonding moment into a stressful experience. While there are many ways to address these challenges, one lesser-known but highly effective approach is craniosacral therapy.What is Craniosacral Therapy?
Craniosacral therapy (CST) is a gentle, hands-on treatment that focuses on the craniosacral system, which includes the membranes and fluids surrounding the brain and spinal cord. The goal of CST is to release tension and imbalances in this system, promoting overall health and well-being.In infants, the craniosacral system is particularly delicate and can be influenced by various factors, including birth trauma, positioning in the womb, or even the birthing process itself. These factors can sometimes lead to issues that affect breastfeeding, such as difficulty latching or discomfort during feeding.
How Can Craniosacral Therapy Help with Breastfeeding?
1. Improving Latch and Sucking ReflexOne of the most common breastfeeding issues is difficulty with latch. A poor latch can cause discomfort for the mother and insufficient milk intake for the baby. Craniosacral therapy can help by gently addressing any structural imbalances in the baby’s mouth, jaw, or neck that might be affecting their ability to latch properly. By releasing tension in these areas, CST can improve the baby’s sucking reflex, leading to a more effective and comfortable latch. 2. Addressing Torticollis and Head AsymmetryTorticollis, a condition where a baby’s head is tilted to one side, can make breastfeeding difficult, particularly when feeding from one breast. Head asymmetry, often caused by pressure during birth, can also lead to discomfort for the baby while nursing. Craniosacral therapy can help by gently realigning the baby’s head and neck, reducing discomfort and making it easier for the baby to nurse effectively from both breasts. 3. Relieving Tension from Birth TraumaThe birthing process can be physically demanding for both mother and baby. Even in uncomplicated births, the pressure exerted on the baby’s head and neck can create tension that affects their ability to breastfeed. Craniosacral therapy helps release this tension, allowing the baby to feed more comfortably and efficiently. It can also help calm babies who are fussy or unsettled due to discomfort from birth trauma. 4. Enhancing Overall Comfort for the BabyDiscomfort during feeding can sometimes be linked to tension or restrictions in the baby’s body. Craniosacral therapy can promote relaxation by helping the baby’s nervous system to settle, leading to a more relaxed and contented baby. A relaxed baby is more likely to feed well, which in turn can improve milk supply and overall breastfeeding success. 5. Supporting Maternal Well-beingCraniosacral therapy isn’t just beneficial for babies; it can also be helpful for mothers. The stress and anxiety that often accompany breastfeeding challenges can make the experience even more difficult. CST sessions for the mother can promote relaxation, reduce stress, and even help with physical issues such as back or neck pain, which can arise from prolonged breastfeeding sessions.What to Expect During a Craniosacral Therapy Session
A craniosacral therapy session is typically a gentle and calming experience. For babies, the therapist will use light touch to assess and release tension in the craniosacral system. The treatment is non-invasive, and most babies find it soothing and relaxing.Sessions usually last between 30 to 60 minutes, and the therapist will work at the baby’s pace, taking breaks as needed to ensure the baby remains comfortable. For breastfeeding issues, the therapist may focus on the head, neck, and jaw areas, but they may also address other parts of the body to ensure the entire craniosacral system is balanced.Is Craniosacral Therapy Right for You and Your Baby?
Craniosacral therapy is a safe and gentle option for addressing breastfeeding issues. It can be particularly helpful if you’ve tried other methods without success or if you’re looking for a holistic approach that considers both your and your baby’s well-being.As with any therapy, it’s important to consult with a qualified practitioner who has experience working with infants. They can assess your baby’s specific needs and determine the most appropriate course of treatment.Conclusion
Breastfeeding challenges can be tough, but you don’t have to face them alone. Craniosacral therapy offers a gentle, holistic approach to improving latch, relieving discomfort, and promoting a more positive breastfeeding experience for both mother and baby. If you’re struggling with breastfeeding, consider exploring craniosacral therapy as part of your journey toward a more comfortable and fulfilling nursing experience.
More info and resources:
1. “Craniosacral Therapy for Infants and Children” by Dr. John UpledgerDr. Upledger, the founder of craniosacral therapy, offers insights into how CST can help with various infant conditions, including breastfeeding challenges. This book is a foundational resource on the topic. 2. The Upledger Institute InternationalThe institute provides extensive information on craniosacral therapy, including its application in pediatric care and breastfeeding support. Their website offers articles, research papers, and practitioner directories: Upledger Institute. 3. “Craniosacral Therapy and Breastfeeding” by Rebecca Flowers, IBCLC, CSTThis article explores the connection between CST and breastfeeding, offering case studies and practical examples of how CST has helped improve breastfeeding outcomes. Available through various lactation consultant resources. 4. “Craniosacral Therapy: A Gentle Approach to Helping Babies Breastfeed” by Karen Gromada, MSN, RN, IBCLCPublished in the Journal of Human Lactation, this article discusses how CST can aid in addressing common breastfeeding issues. 5. “The Role of Craniosacral Therapy in Infant Feeding and Lactation” by Lise Eliot, PhDDr. Eliot, a neuroscientist, explores how craniosacral therapy impacts the nervous system and how it can support better breastfeeding outcomes. This article is available in specialized pediatric and lactation journals. 6. La Leche League InternationalWhile not specifically focused on craniosacral therapy, LLLI offers resources on breastfeeding challenges, which often mention alternative therapies like CST. Visit their website at La Leche League International. 7. “Clinical Applications of Craniosacral Therapy” by John E. UpledgerA more advanced text that covers various clinical uses of CST, including its application in pediatric care and breastfeeding support.
Sweet girl is one!
Baby Hattie is not much of a baby anymore.
What a year. Not to play favorites or anything but my 2nd kiddo’s first year of life was 2020 and this year was…much better. It was so fun to integrate Hattie into our crazy lives. My boys are at different schools (preschool and elementary) and both communities were so supportive and always excited to see her. Plus gave the boys everything they needed and more when our attention was stretched thin at home.
Some highlights were doing an in person CST class while she was 3/4 weeks old, going to 2 weddings in her first 3 months, having a daughter, first smiles, seeing her brothers interact with her, and become closer to each other, overcoming hip dysplasia, being an exceptional crawler, Baby Booty workouts, meeting new healers and bringing them into our orbit, our mother daughter trip to my high school reunion in California, coming home to you after supporting other families, seeing your love of dogs blossom, your need to say hello to any other babies you come across, watching you take to solid foods so well, bonding with second cousins at the south jersey shore, road tripping to Alabama/Florida…Wait, is this actually a list of my symptoms of insanity? Quite possibly. But girl, it’s been a wild ride and I’m so glad you are here!!!
I’ve told other people that I think the hardest age is 1-3, so time for us to buckle up. Right now we are going through some challenges with food allergies so we have a journey ahead of us there. Thanks for following along!
